Well the overall effect was fantastic. But better yet, I thought it would make for a great Fall project for me and my kids. Plus it would make for a beautiful decoration to bring the outdoors in during one of Mother Nature’s biggest shows! Indeed, I was right on both assumptions!
We had perfectly beautiful Fall day here the weekend of Halloween. We went to the wooded pond near our house and hunted for leaves. What a great time we had! We found Linden leaves, Maple leaves, Oak leaves, Birch leaves, and even Ginko leaves! Believe it or not, we even found wild raspberries still putting out fruit with a vengeance! We even found a dead raccoon! Yikes!
The kids collected until their Halloween pumpkin buckets were full. Then we came home to begin the project.
First We Dried & Pressed the Leaves.
We made our own leaf press by using paper towels, old cardboard boxes and bungee cords. Here is the “how-to”.
1. Take a piece of cardboard and place two paper towels atop it.
2. Then the carefully arranged one layer of leaves, being careful that none touched and none went past the edge of the paper towel.
3. Place a paper towel on top of that layer and arrange more leaves.
4. Repeat until all leaves are accounted for.
5. Take another piece of cardboard and place it on top.
6. Secured the bundle tightly with bungee cords. You could also use a large heavy book, rock or even a canister of flour!
7. Leave alone for several days until leaves are dry and pressed.
Then We Made the Decorations.
I believe the Martha Stewart directions called for some fancy glue and “mono filament” (fishing wire). But we didn’t have either. So we just used good ole' Elmer’s school glue and embroidery floss.
1. Gather your mono filament, embroidery floss, yarn or dental floss…. whatever! Cut it to the length you desire.
2. Find two like-sized leaves. Lay one face down on table. Add a dollop of glue to its back.
3. Next take your mono filament, embroidery floss, yarn or dental floss and place it in the dollop of glue.
4. Then take the other leaf and apply to the first leaf with glue and string.
5. Press down gently to adhere.
6. Move down the string to your next leaf grouping.
7. Repeat until desired length is reached.
8. Put aside to dry.
Finally, We Hung the Leaf Decorations.
We placed the decorations in our door jamb to bring the outdoors inside; to make it look as though leaves were falling in the house.
Celebrate Fall Leaves by Bringing Them Into Your Own Home!
If you are looking for more ways to celebrate Autumn and its bounty of beauty, take a look at these cool things I found on Etsy. Plus check out my site for recent additions of fall themed items.
At www.fineline-antiques.com you will find several leaf-themed items:Vintage Vera Neumann Scarf,Vintage Bark Cloth Cutter, and a Hand Made Therapeutic Grain Heating Pad.


 There are some really great vendors online that are also offering ways to celebrate Fall.
Here is a really ethereal fine-art print of Autumn leaves falling into a vintage train case. You can find this and other phenomenally beautiful nature photographs at www.irenesuchocki.etsy.com.
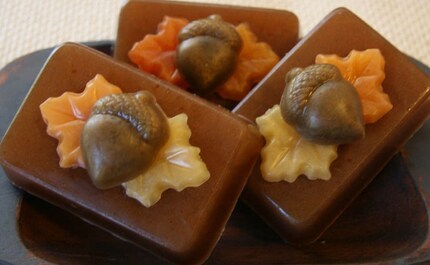
 Take the Fall beauty indoors again with these great handmade soaps. These chocolaty-brown soaps with maple leaf and acorn adornments look almost good enough to eat!
Soaps by www.ShopDavinia.etsy.com.
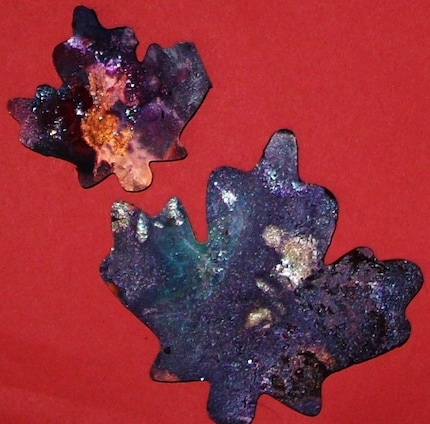
Finally take a look at this unique item Autumn Leaf crayons
 by www.Missing6.etsy.com. Made of 100% non-toxic recycled wax based crayons, these almost look like Raku pottery and embody the color and beauty of Fall.
Whatever you do, be sure to make the most of Nature's Fall display before it resigns to a naked quietness for Winter's sleep.


No comments:
Post a Comment